Clogged gutters can cause foundation damage, basement flooding, roof rot, and mold growth. Regular cleaning prevents these problems and saves homeowners thousands in repairs.
Homeowners should schedule two cleanings per year in late spring and late fall. Homes with overhanging trees or frequent storms may need quarterly cleanings for optimal protection. Visit https://www.gutterscoloradospringspro.com/ for more information.
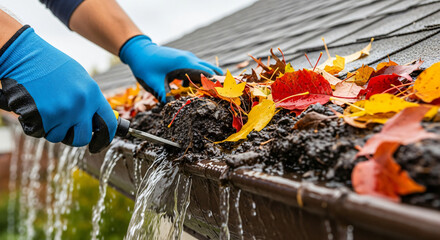
Seasonal Debris
Many homeowners don’t think about their gutters until they become clogged and begin to overflow with water or twigs and leaves. Gutter cleaning is a vital home maintenance task that protects roofs, foundations, and siding from serious damage. The frequency of gutter cleaning varies depending on local environmental factors and tree types.
A general rule of thumb is to clean your gutters twice a year, once in the fall as the leaves are shedding, and again in spring before the rainy season begins. However, some homeowners may need to clean their gutters more frequently than this. A lot of debris can accumulate in a short amount of time, so if you live in an area with dense trees that shed their foliage throughout the year, a once a year schedule is likely not sufficient.
If you have a lot of pine or eucalyptus trees near your home, they tend to shed their needles year round and are often the primary cause of clogged gutters. A clogged gutter will not only overflow and spill onto your roofline, but it can also create a cozy nest for pests like mice, insects, and mosquitoes. If your gutters are regularly cleaned, the food sources for these pests will be diminished, so they are less likely to settle in your yard or around your house.
As the summer heats up, debris starts to move faster and more easily. This can cause a buildup in the gutter that leads to overflows and can even block the downspout entirely. In addition to being an eyesore, clogged gutters will lead to water damage on the roof and in the foundation, as well as mold growth and wood rot.
While it can be tempting to rely on a pushbroom or leaf blower to clean your gutters, this method will likely only result in a mess all over your landscaping and exterior walls. The best way to clean your gutters is with the help of a professional service that will use hand scoops to remove all of the debris and ensure that every downspout is clear. This is the only way to be certain that your gutters are completely clean and free of clogs and pests.
Overhanging Trees
If you live near trees, your gutters will need cleaning more often. Overhanging tree branches can drop debris in your gutters throughout the year, clogging them and causing damage to your home’s structure. You can minimize the need for regular cleaning by pruning your trees and ensuring they are not overhanging your property. Gutter guards and screens can also reduce maintenance needs by preventing debris from entering the gutter system.
Gutter cleaning helps protect your home from water damage, foundation problems, siding damage, and mold growth by directing water away from the roof and home’s structure. A clogged gutter can cause water to seep under the shingles, into the fascia boards, and into the walls of your house. It can also sag the gutter system and deteriorate the wood. Regular cleanings ensure that the gutter system is working properly and avoiding costly repairs.
The average homeowner should schedule gutter cleaning at least twice per year, typically in late spring and fall to prevent clogs. However, a variety of factors can increase the need for gutter cleaning, including local weather and the type of trees around your property. Homes that have overhanging trees or frequent storms may need quarterly or even monthly cleanings for optimal protection.
Fall is the most important season for gutter cleaning, as the majority of leaves will need to be removed before winter arrives. However, not all falls are the same, and you’ll want to wait until most of the leaves have fallen before scheduling your fall cleaning.
While the primary reason for cleaning your gutters is to avoid water damage, you can also use this opportunity to inspect the system for other issues like missing shingles or rusting downspouts. Additionally, you can take advantage of digital tools for maintenance tracking to set reminders, log work completed, and view a comprehensive record of your gutters.
Gutter cleaning is one of the most overlooked yet essential parts of your home maintenance routine. Blocked gutters can damage your roof, siding, and foundation over time, costing thousands of dollars in repair costs. Clogged gutters also promote weed growth and encourage insect infestations. By implementing proactive measures like gutter guards and regularly scheduled cleanings, you can extend the life of your gutters and enjoy peace of mind knowing they’re protecting your home.
Local Weather
Gutter cleaning is one of the most important yet overlooked home maintenance tasks. When the gutters become clogged, water overflows and leads to problems like roof damage, foundation cracks, mold growth, and other costly repairs. Regularly scheduled cleanings prevent blockages and allow water to flow freely, protecting the home’s structure and extending its lifespan.
The general recommendation is to clean the gutters twice a year, in late spring and fall. However, there are many factors that determine how often the gutters need to be cleaned. The local environment, including surrounding trees and vegetation, will influence how quickly the gutters fill with debris. For example, deciduous trees shed their leaves in the fall, which can lead to clogs. Evergreen trees may drop needles year-round, which can also obstruct the gutters.
Additionally, local weather will influence how much precipitation your area receives. Heavy rains and frequent storms can cause the debris to pile up faster, requiring more frequent cleanings. Gutter guards can help reduce the frequency of cleaning needed by preventing large debris from entering the gutters in the first place. However, homeowners should still consider a regular inspection schedule to ensure the gutters are clear of debris and functioning properly.
Creating a log of maintenance can be helpful to keep track of cleaning dates and methods, as well as any observations related to clogs or damages. Tracking maintenance with digital tools can simplify the process, making it easier to monitor the state of the gutters and determine if the maintenance schedule needs to be adjusted.
Regularly maintained gutters protect the home’s structure and extend its lifespan, while promoting a healthy ecosystem around the property. Taking the time to understand how environmental factors impact gutter cleaning needs can help homeowners create a personalized maintenance schedule for their home. By combining cleanings with other key home maintenance activities, such as roofing inspections, homeowners can improve the effectiveness and efficiency of their upkeep efforts while minimizing costs and hassles. Gutter cleanings can be a significant investment, but understanding how they safeguard the home and save money over time can encourage homeowners to invest in consistent maintenance.
Gutter Guards
Gutter guards significantly reduce the need for frequent cleaning, but they don’t eliminate it completely. Small debris like seeds, fine pollen and twigs still get into gutter systems through openings. To avoid this issue, homeowners should choose a durable design such as reverse curve or mesh gutter covers that prevent these small particles from entering the system while allowing water to flow freely.
The type of environment surrounding a home also influences gutter maintenance, as homes in densely vegetated areas often need to clean gutters more frequently. For example, a house with many pine trees around it may experience heavy debris accumulation during autumn, especially when the trees shed their leaves. Similarly, homes in windy regions may experience debris buildup year-round.
In addition to preventing blockages that can cause roof leaks, landscaping erosion and basement flooding, well-functioning gutters provide many other benefits. For example, they help control mosquito breeding grounds and rodent nesting spots by diverting pests away from the house’s foundation. Additionally, a well-functioning gutter system protects the roof underlayment and extends the lifespan of the gutters and downspouts.
Gutter cleaning is a crucial part of home maintenance that requires regular attention and monitoring. It is essential to track your cleaning schedule and methods so you can identify recurring issues quickly. Using a maintenance log can simplify your home care tasks, making proactive gutter maintenance easier to manage. Moreover, keeping up with your gutter cleaning can help prevent costly repairs and keep your home’s value high.